Contents
- Objectives
- Docker Compose
- Identity and Access Management (IAM) User
- Identity and Access Management (IAM) Role
- Elastic Container Registry (ECR)
- Elastic Container Service (ECS) Cluster
- Configure and add Task Definition to Repo
- Github Secrets
- Github Actions
- See The Application Running
Objectives
The goal is to use Github Actions for continous deployment to an AWS ECS cluster.
Before getting started, make sure you have an AWS account and have Git, Node and Docker installed.
We will start by forking this simple full stack React/Express application. Once forked into your Github account, make a clone on your local machine.
For local development I am using a docker-compose enivornment. Docker Compose makes it very simple to link, build, and run multiple containers at the same time. For this project we have two containers, one for the React application and the other for MongoDB.
For our production cloud environment we will be using AWS ECR and ECS.
*This guide uses the AWS Web GUI. If I were to do this today I would lean more towads AWS CLI. But none the less it was a good way for me to learn the material and maybe for you too.
Docker Compose
To get the local docker-compose environment running, there are a few steps to take.
1) Build the front end client, by running the following commands:
  $ cd client
  $ npm install
  $ npm run-script build
  $ cd ..
2) Run the docker-compose.yml file located in /server.
  $ cd server
  $ docker-compose up
You should now see the application runnning on http://localhost:3001/.
Identity and Access Management (IAM) User
First we have to create a user within our AWS account that will have access to perform all the tasks required. For this we will use Identity and Access Management (IAM)
1) Within the ECS Console, click "IAM" on the navigation pane, then click "Users" under IAM Resources and finally click the "Add user" button.
2) We'll name the user "User-ECR-ECS" and give it "Programmatic access".

3) Click the "Next: Permissions" button.
4) Click the "Attach existing policies directly" option.
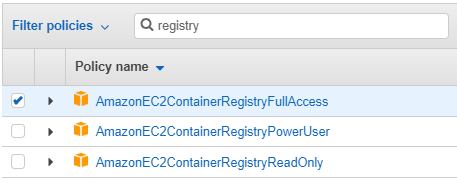
5) Search for "ECS", check the following policies, search for "registry" and select the following policy.

6) Click the "Next: Tags" button.
7) Click the "Next: Review" button.
8) Click the "Create user" button.
9) Click the "Download .csv" button to download your user credentials.
10) Click the "Close" button.
Identity and Access Management (IAM) Role
Now we need to create an IAM Role. This will provide access to other AWS service resources that are required to run Amazon ECS tasks.
1) Navigate back to AWS IAM and click on "Roles" and then click the "Create role" button.
2) Keep the default trusted entity type which should be "AWS service", click on "Elastic Container Service" which is highlighted below and then "Elastic Container Service Task" which is also highlighted.

3) Click "Next: Permissions" button.
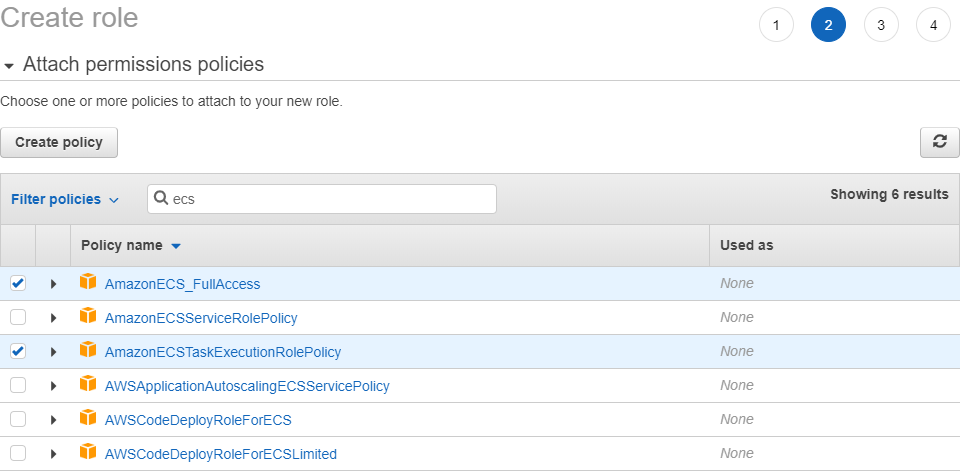
4) Search "ecs" and select the policies shown below.
5) Click the "Next: Tags" button.
6) Click the "Next: Review" button.
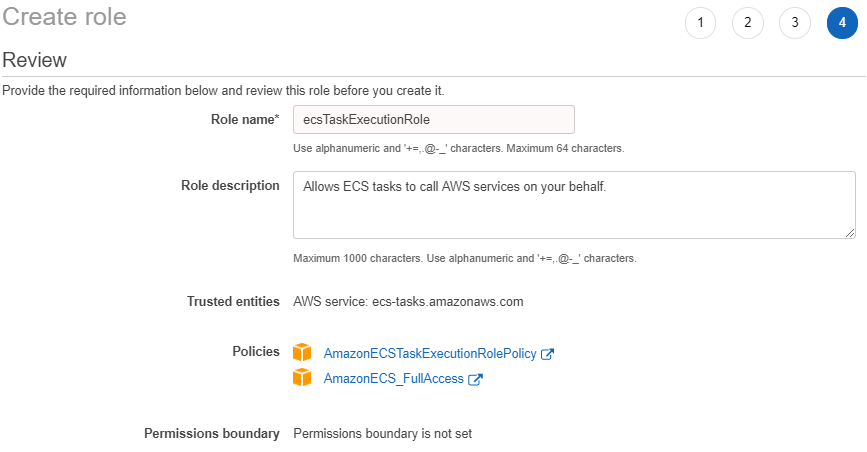
7) We're going to give our role the name "ecsTaskExecutionRole".
Elastic Container Registry (ECR)
Next we want to setup our Amazon Elastic Container Registry (ECR). This is where AWS will store our images.
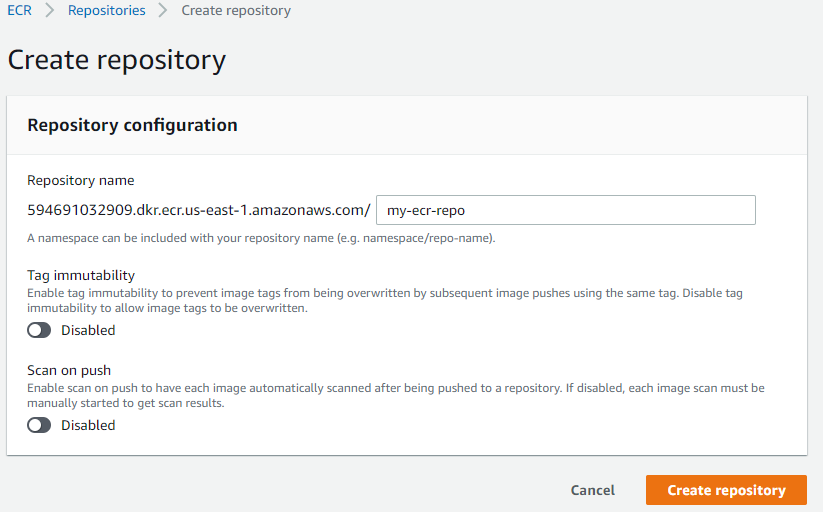
1) Within the ECS Console, click “ECR” on the navigation pane, and then click the “Create repository” button.
2) We will name our repo 'my-ecr-repo' and then click "Create repository".
3) You should now see a green banner that says "Successfully created repository my-ecr-repo"
Elastic Container Service (ECS) Cluster
Next we want to setup our Amazon Elastic Container Service (ECS) Cluster. This is where our images will be deplyed to.
1) Navigate to Amazon ECS and click the "Get Started" button.
2) Under "Container definition" select the "custom" image option and hit the "edit" button, as shown below.
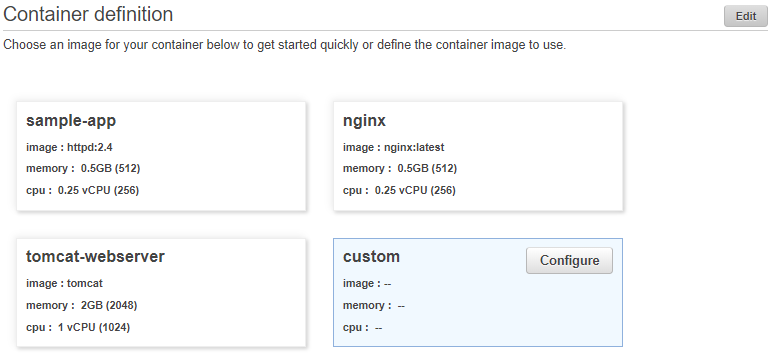
3) We're going to name the container "my-container", set image to "my-ecr-repo" and map port 80 to tcp.
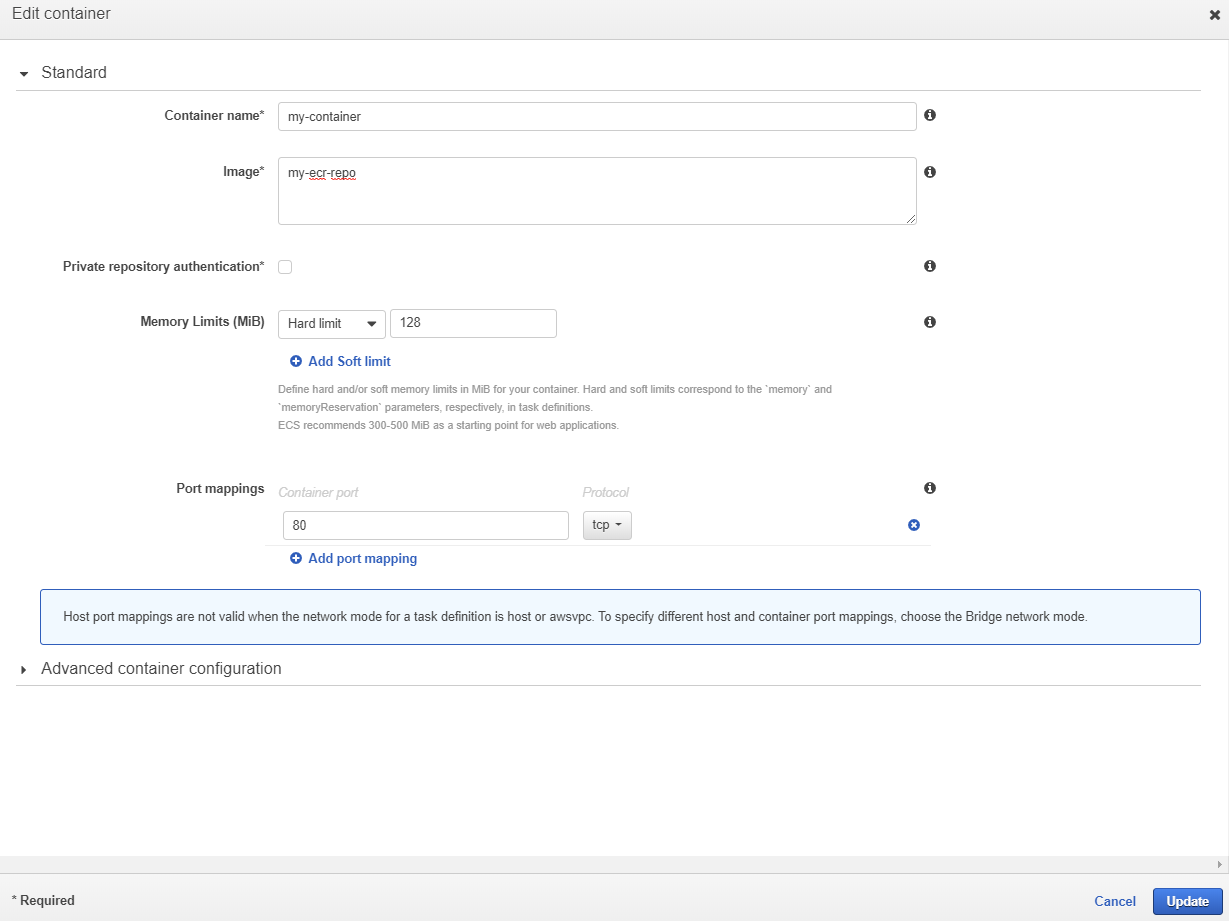
4) Click the "Update" button.
5) Under "Task definition" click the "Edit" button.
6) We're going to name the task definition "my-task-definition" and select our "ecsTaskExecutionRole". By default "awsvpc" and "FARGATE" should be the other two selected details.
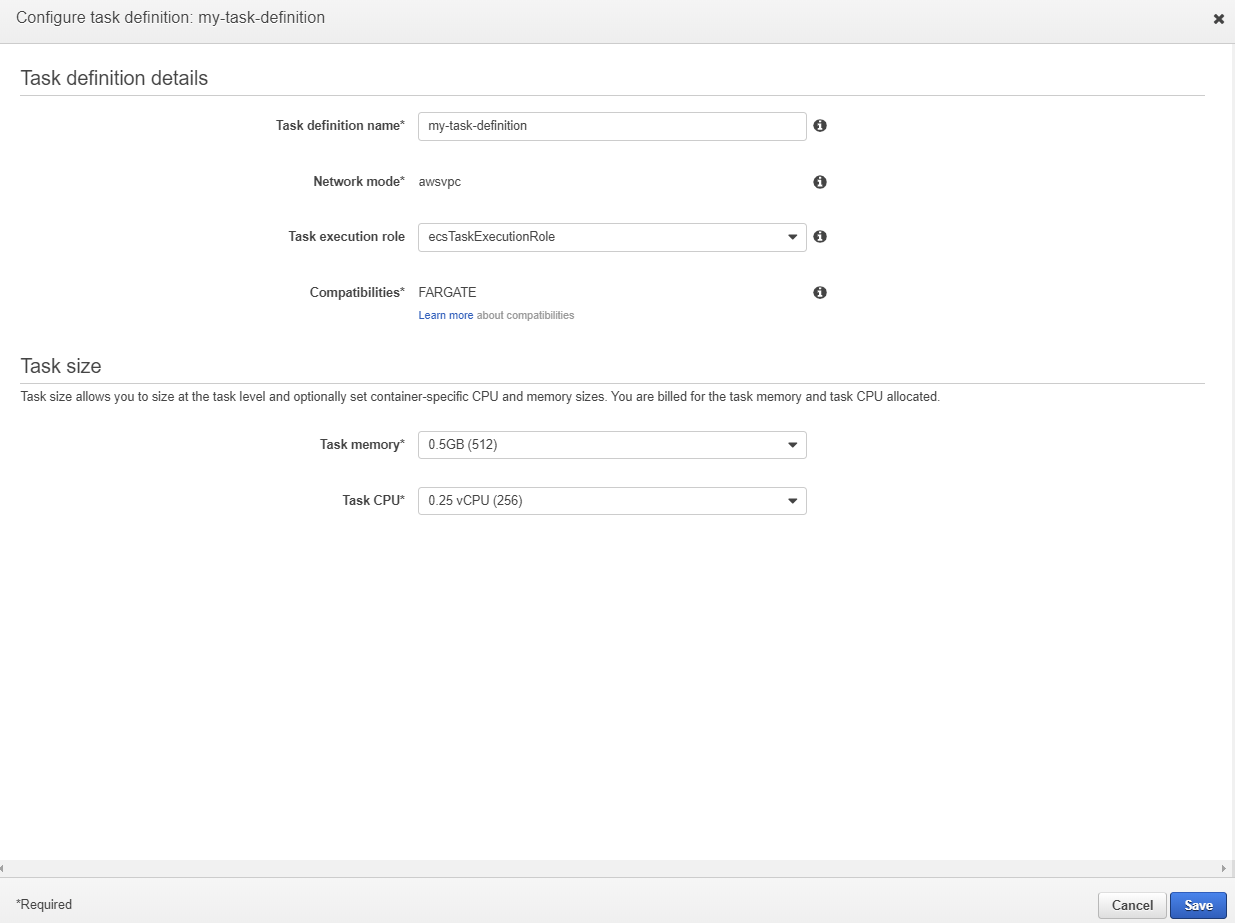
7) Click the "Save" button and the side panel should disappear.
8) Click the "Next" button.
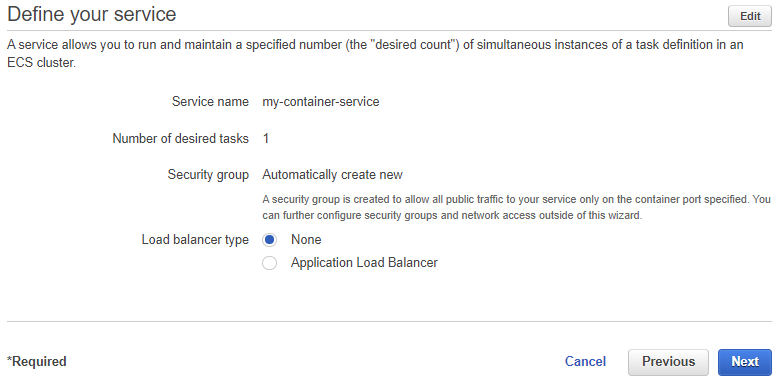
9) By default "Service name" should be "my-container-service". If not, change it to that and click the "Next" button.
10) Under Cluster name, we will put "my-cluster" and click the "Next" button.
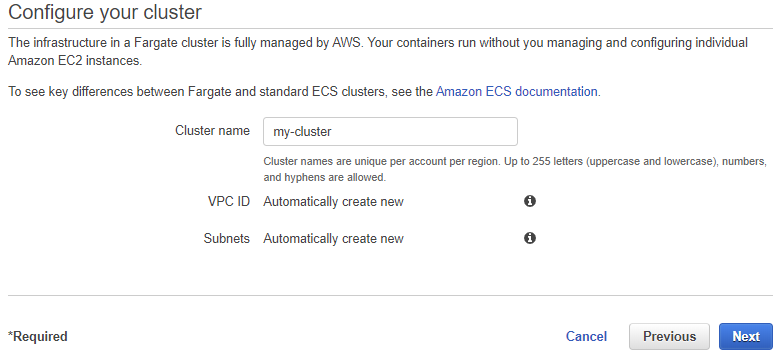
11) Your settings should look like the screenshot below. If yes, click the "Create" button.
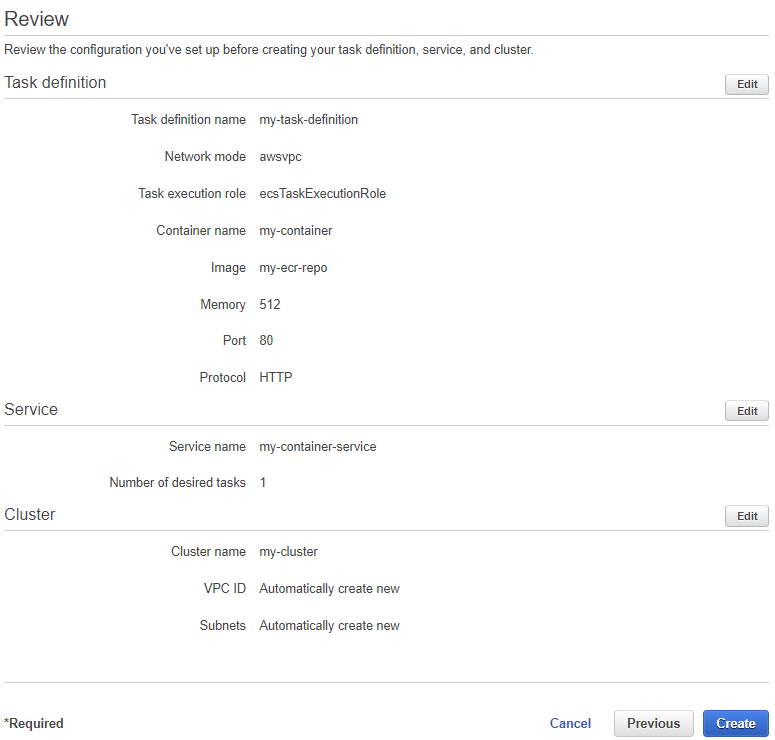
12) Once the launch status is complete, click the "View service" button and you'll see our newly created cluster with an ACTIVE service named "my-container-service".
Configure and add Task Definition to Repo
Now we want to copy our Task Definition into our projects repo. A Task Definition is a configuration file that specifies the container information for your application, such as how many containers are part of your task, what resources they will use, how they are linked together, and which host ports they will use.
On the left side pane on the AWS ECS Console click "Task Definitions". You should now see the newly created "my-task-definition".
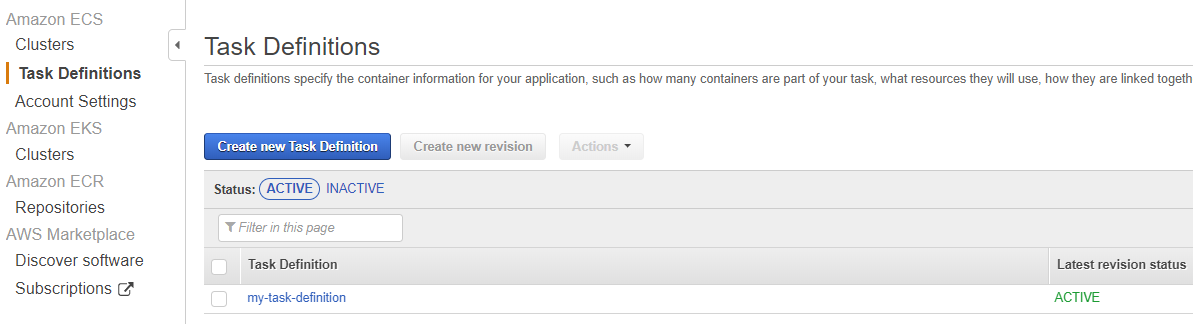
Click on "my-task-definition".
Click on "my-task-definition:1"
Click on the "JSON" tab.
Copy the JSON.
Now, we will go back to our React application, create a file in the root of the project called "task-definition.json" and paste our copied JSON into the file.
Now we need to change a few things in this file. First, we are going to add some environment information that our project requires. Look for the line that says:
"environment": [],
We're going to change it to:
  "environment": [
    {
      "name": "DB_URL",
      "value": "mongodb://localhost:27017/fortunate_prod_db"
    },
    {
      "name": "PORT",
      "value": "80"
    }
  ],
Next, we're going to add a mongo container to our deployment. Look for this line below, this is where our applications container configuration ends:
    "name": "my-container"
  }
We're going to add information about our mongo container right after it, like so:
    "name": "my-container"
  },
  {
    "name": "mongo",
    "image": "mongo:latest",
    "portMappings": [
      {
        "hostPort": 27017,
        "containerPort": 27017
      }
    ],
    "memory": "512",
    "cpu": "256",
    "essential": true
  }
Once done, we can git add, commit and push this file to the repo.
Github Secrets
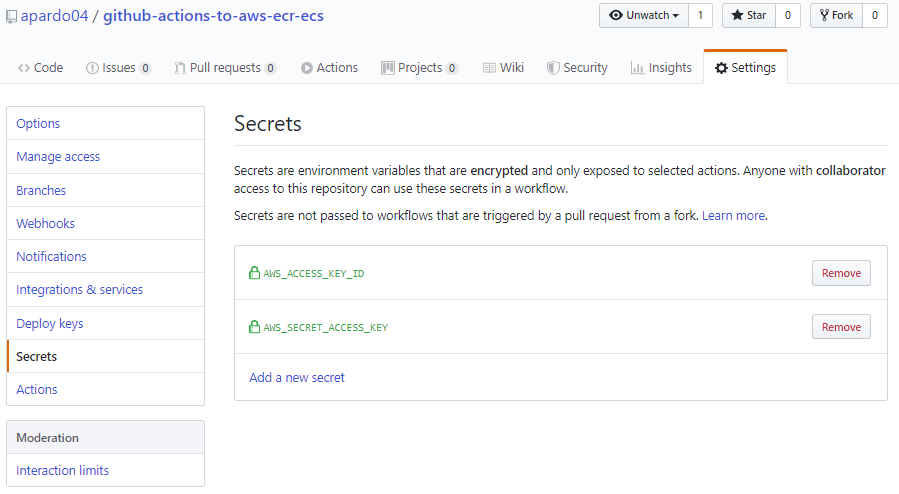
Head over to the forked repo's webpage on Github and click the "Settings" tab.
Click on "Secrets" on the left menu.
Click "Add a new secret".
Now we need to open the credentials csv file we downloaded earlier from AWS.
We're going to add 2 secrets, that Github Actions will need to be able to deploy to our ECS Cluster. They will be:
Name: AWS_ACCESS_KEY_ID
Value: Paste the value for the "Access key ID" column found in the csv.
Name: AWS_SECRET_ACCESS_KEY
Value: Paste the value for the "Secret access key" column found in the csv.
Github Actions
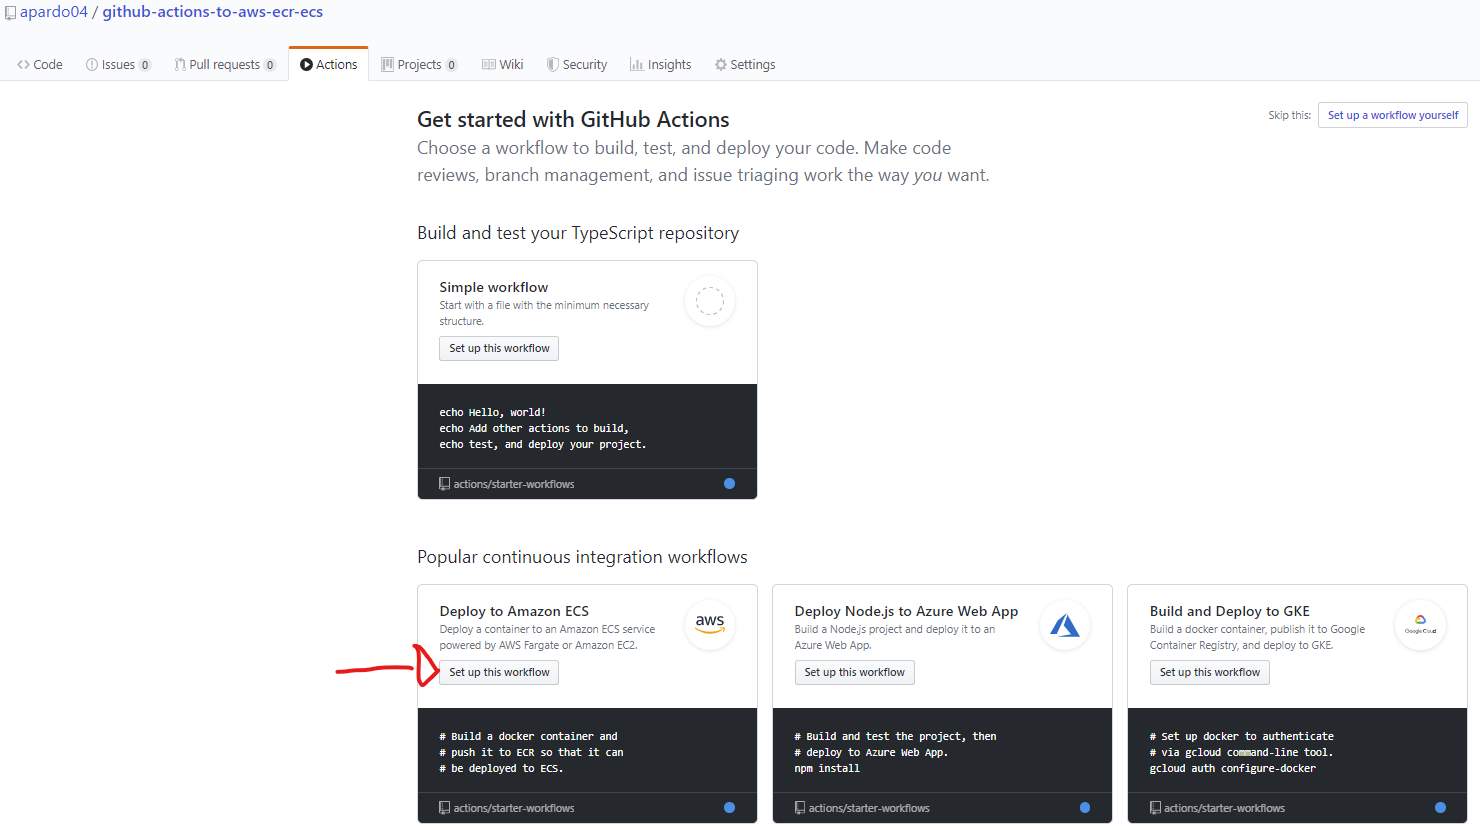
Now click on the "Actions" tab.
From here, one of the recommended workflows will be "Deploy to Amazon ECS". Click the "Set up this workflow" button.
Now Github will display text that is going to be part of our aws.yml file. This file will get triggered everytime we push to master, because of this code block:
  on:
  push:
    branches:
      - master
There a few changes we have to make to the aws.yml file for everything to line up correctly. At the end of this section, I will have the full aws.yml file with all changes that can be copied.
1) You may need to change the "aws-region" value, depending what region you setup your IAM user and cluster. Mine is in us-east-1, so I had to change it from the default us-east-2:
  - name: Configure AWS credentials
    uses: aws-actions/configure-aws-credentials@v1
    with:
      aws-access-key-id: ${{ secrets.AWS_ACCESS_KEY_ID }}
      aws-secret-access-key: ${{ secrets.AWS_SECRET_ACCESS_KEY }}
      aws-region: us-east-1
Next we need to add a few lines of code that will build our client and copy it over to the server directory:
  - name: npm install client
    run: npm install
    working-directory: ./client
  - name: Build the client
    run: npm run-script build
    working-directory: ./client
Next, we need to change the value for "ECR_REPOSITORY" to "my-ecr-repo" and docker build needs to occur in the server directory, so we add "./server":
- name: Build, tag, and push image to Amazon ECR
  id: build-image
  env:
    ECR_REGISTRY: ${{ steps.login-ecr.outputs.registry }}
    ECR_REPOSITORY: my-ecr-repo
    IMAGE_TAG: ${{ github.sha }}
  run: |
    # Build a docker container and
    # push it to ECR so that it can
    # be deployed to ECS.
    docker build -t $ECR_REGISTRY/$ECR_REPOSITORY:$IMAGE_TAG ./server
    docker push $ECR_REGISTRY/$ECR_REPOSITORY:$IMAGE_TAG
    echo "::set-output name=image::$ECR_REGISTRY/$ECR_REPOSITORY:$IMAGE_TAG"
In the next section, we change the value of "container-name" to be "my-container":
- name: Fill in the new image ID in the Amazon ECS task definition
  id: task-def
  uses: aws-actions/amazon-ecs-render-task-definition@v1
  with:
    task-definition: task-definition.json
    container-name: my-container
    image: ${{ steps.build-image.outputs.image }}
Finally, for the final section of the aws.yml file we change the value of "service" to be "my-container-service" and "cluster" to be "my-cluster":
- name: Deploy Amazon ECS task definition
  uses: aws-actions/amazon-ecs-deploy-task-definition@v1
  with:
    task-definition: ${{ steps.task-def.outputs.task-definition }}
    service: my-container-service
    cluster: my-cluster
    wait-for-service-stability: true
The whole file should look like this with the the comments deleted:
  on:
  push:
    branches:
      - master

  name: Deploy to Amazon ECS

  jobs:
  deploy:
    name: Deploy
    runs-on: ubuntu-latest

    env:
      server-directory: ./server
      client-directory: ./client

    steps:
    - name: Checkout
      uses: actions/checkout@v2

    - name: Configure AWS credentials
      uses: aws-actions/configure-aws-credentials@v1
      with:
        aws-access-key-id: ${{ secrets.AWS_ACCESS_KEY_ID }}
        aws-secret-access-key: ${{ secrets.AWS_SECRET_ACCESS_KEY }}
        aws-region: us-east-1

    - name: npm install client
      run: npm install
      working-directory: ${{ env.client-directory }}
    - name: Build the client
      run: npm run-script build
      working-directory: ${{ env.client-directory }}

    - name: Login to Amazon ECR
      id: login-ecr
      uses: aws-actions/amazon-ecr-login@v1

    - name: Build, tag, and push image to Amazon ECR
      id: build-image
      env:
        ECR_REGISTRY: ${{ steps.login-ecr.outputs.registry }}
        ECR_REPOSITORY: my-ecr-repo
        IMAGE_TAG: ${{ github.sha }}
      run: |
        # Build a docker container and
        # push it to ECR so that it can
        # be deployed to ECS.
        docker build -t $ECR_REGISTRY/$ECR_REPOSITORY:$IMAGE_TAG ./server
        docker push $ECR_REGISTRY/$ECR_REPOSITORY:$IMAGE_TAG
        echo "::set-output name=image::$ECR_REGISTRY/$ECR_REPOSITORY:$IMAGE_TAG"

    - name: Fill in the new image ID in the Amazon ECS task definition
      id: task-def
      uses: aws-actions/amazon-ecs-render-task-definition@v1
      with:
        task-definition: task-definition.json
        container-name: my-container
        image: ${{ steps.build-image.outputs.image }}

    - name: Deploy Amazon ECS task definition
      uses: aws-actions/amazon-ecs-deploy-task-definition@v1
      with:
        task-definition: ${{ steps.task-def.outputs.task-definition }}
        service: my-container-service
        cluster: my-cluster
        wait-for-service-stability: true
We're now done configuring the aws.yml file. We can now click the "Start commit" button, add a commit message and click the "Commit new file" button.
Now click on the "Actions" tab again and you will see Github is starting to run our aws.yml file that was triggered by our push.
See The Application Running
If you got no errors, then lets go back to our AWS ECS Console.
Click on "my-cluster"
Click on "my-container-service"
Click the "Tasks" tab
Click on the task it self that has a status "RUNNING"
Look in the "Network" section for a "Public IP", copy and paste that IP into your web browser and you should see the application running and talking to the database (meaning you're recieving fortunes), like below:

Didn't get the same result? Stuck? Or want to discuss? Leave a message in the Disqus Thread or message me on Twitter.